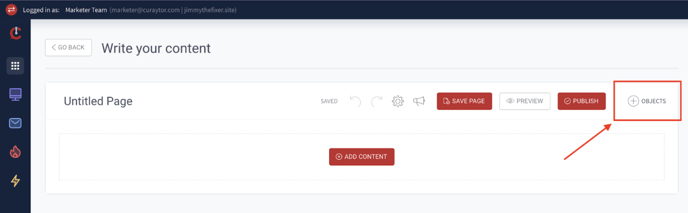
First, you'll start in the content creator and click the "+" to add an object.
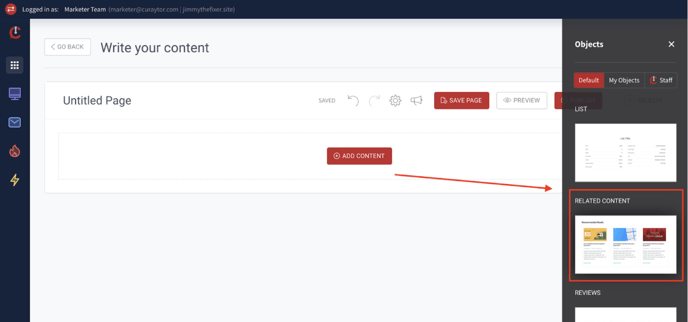
Scroll down to add the "Related Content" object.
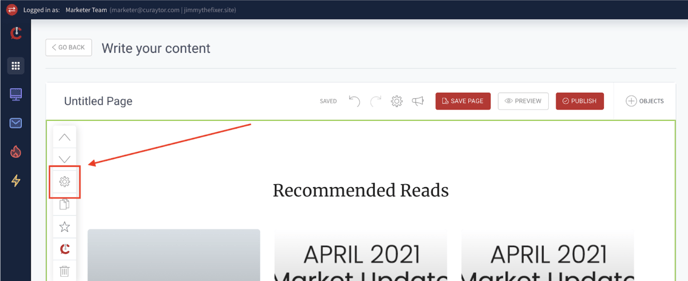
Select the object settings gear to access the settings of the Related content object.
There are several different types of related content you can choose from including: List, Grid, Large Grid, Tabs, Masonry, Most Recent Review, Most Recent Post, Choose any page, Youtube Playlist, Vertical Slider, and Multiple Pages Carousel. Below we will take you through how and when to use each type.
List
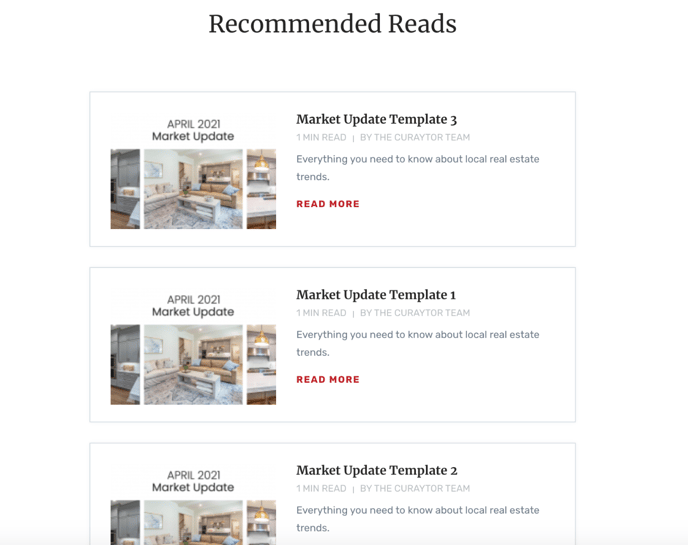
Select the List related content type option. This option will display a list of content vertically using a specific tag.
Scroll down to the “Content Selection” section. Here you can choose the number of pages to show in this object on your site. You can choose between 1 and 12 page but please note that you will only see 3 in the backend of your site when you are editing the object.
Next you can filter the content shown in this object by using tags.
To tag your content, go to your Pages dashboard and click the “+” button under the Page title. Start typing the name of your tag, please note the spelling should be exactly the same when tagging different pages with the same tag. You can also add multiple tags to one page.
Go back to the page you were creating and into the object settings and scroll down to the “Content Selection” section and add your content tags in the Search bar.
This is how your Related Content List will appear on your site:
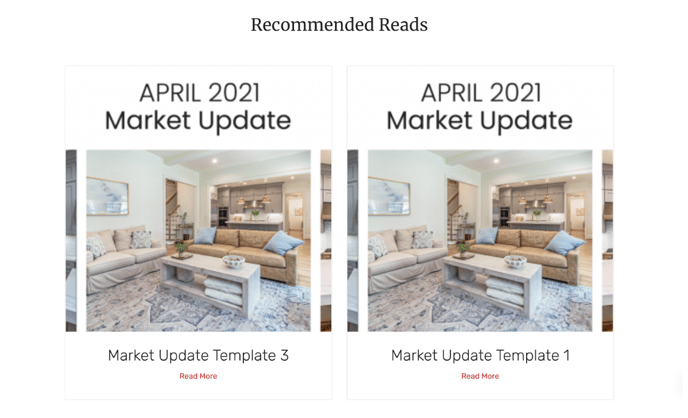
Grid
Select the Grid related content type option. This option will display a list of content horizontally using a specific tag.
Scroll down to the “Content Selection” section. Here you can choose the number of pages to show in this object on your site. You can choose between 1 and 12 pages but please note that you will only see 3 in the backend of your site when you are editing the object.
Next you can filter the content shown in this object by using tags.
To tag your content, go to your Pages dashboard and click the “+” button under the Page title. Start typing the name of your tag, please note the spelling should be exactly the same when tagging different pages with the same tag. You can also add multiple tags to one page.
Go back to the page you were creating and into the object settings and scroll down to the “Content Selection” section and add your content tags in the Search bar.
This is how your Related Content List will appear on your site:
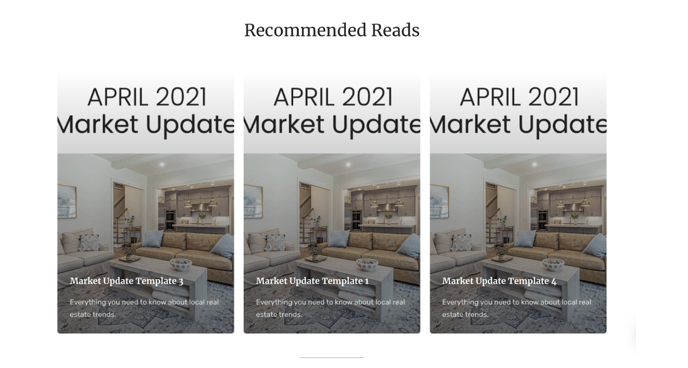
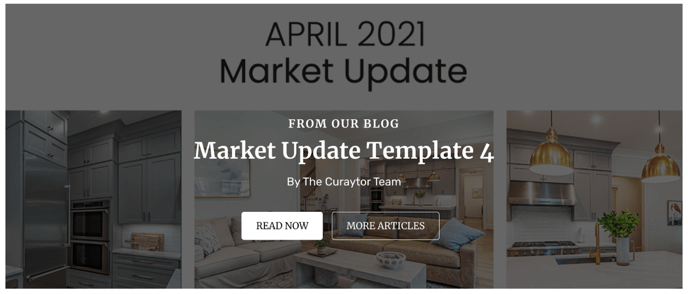
Large Grid
Select the Large Grid related content type option. This option will display 2 pieces of content side by side in large boxes using a specific tag.
Scroll down to the “Content Selection” section. Here you can choose the number of pages to show in this object on your site. You can choose between 1 and 12 pages but please note that you will only see 4 in the backend of your site when you are editing the object.
Next you can filter the content shown in this object by using tags.
To tag your content, go to your Pages dashboard and click the “+” button under the Page title. Start typing the name of your tag, please note the spelling should be exactly the same when tagging different pages with the same tag. You can also add multiple tags to one page.
Go back to the page you were creating and into the object settings and scroll down to the “Content Selection” section and add your content tags in the Search bar.
This is how your Related Content Large Grid will appear on your site:
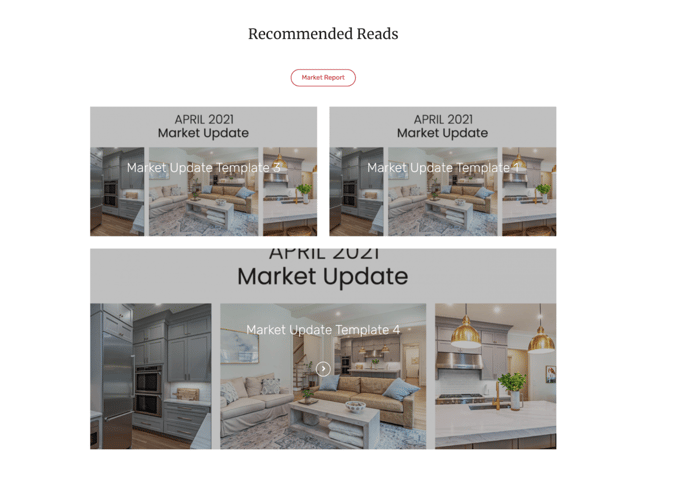
Tabs
Select the Tabs related content type option. This option will display a list of content horizontally using a specific tag.
Scroll down to the “Content Selection” section. Here you can choose the number of pages to show in this object on your site. You can choose between 1 and 12 pages but please note that you will only see 3 in the backend of your site when you are editing the object.
Next you can filter the content shown in this object by using tags.
To tag your content, go to your Pages dashboard and click the “+” button under the Page title. Start typing the name of your tag, please note the spelling should be exactly the same when tagging different pages with the same tag. You can also add multiple tags to one page.
Go back to the page you were creating and into the object settings and scroll down to the “Content Selection” section and add your content tags in the Search bar.
This is how your Related Content Tabs will appear on your site:
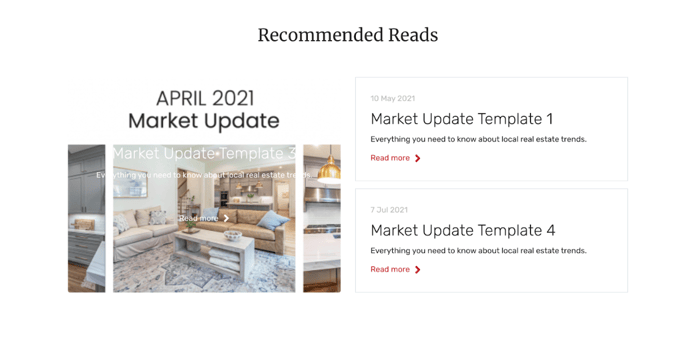
Masonry
Select the Masonry related content type option. This option will display a collage style of content using a specific tag.
Scroll down to the “Content Selection” section. Here you can choose the number of pages to show in this object on your site. You can choose between 1 and 12 pages but please note that you will only see 3 in the backend of your site when you are editing the object.
Next you can filter the content shown in this object by using tags.
To tag your content, go to your Pages dashboard and click the “+” button under the Page title. Start typing the name of your tag, please note the spelling should be exactly the same when tagging different pages with the same tag. You can also add multiple tags to one page.
Go back to the page you were creating and into the object settings and scroll down to the “Content Selection” section and add your content tags in the Search bar.
This is how your Related Content Masonry will appear on your site:
Most Recent Review
This option will display the most recent review from your site settings.
Select the Most Recent Review related content type option.
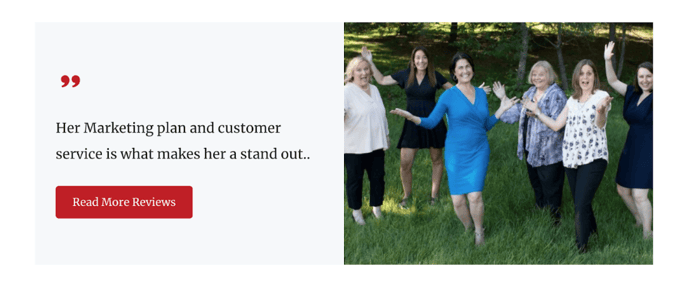
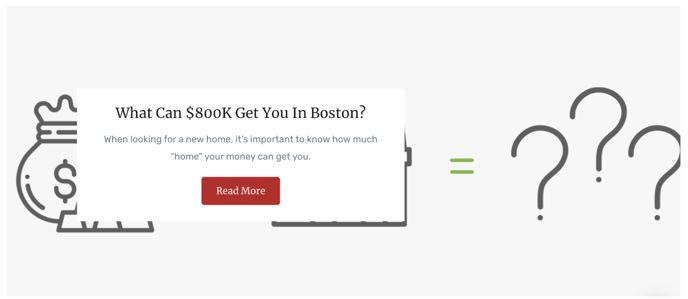
Scroll down to the “Most Recent Review Settings” section. Here you can choose between two views: Split and Full
The split view will be displayed with the review next to an image.
You can choose between Container Width and Full Width and Left or Right alignment.
This is how the Split view will appear on your site:
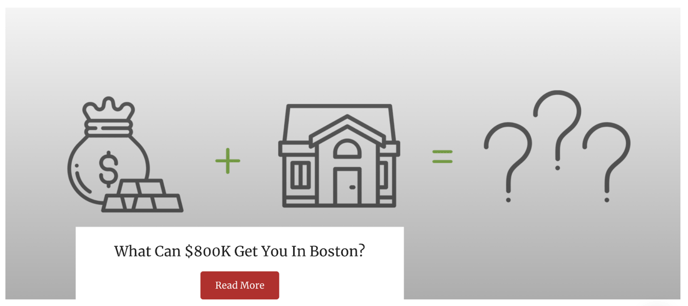
Go back to the “Most Recent Review Settings” section and choose the Full view option.
You can choose between White and Dark view when using the Full view option.
The White option will put a white overlay on the background photo with black text on top.
This is how the White option will appear on your site:
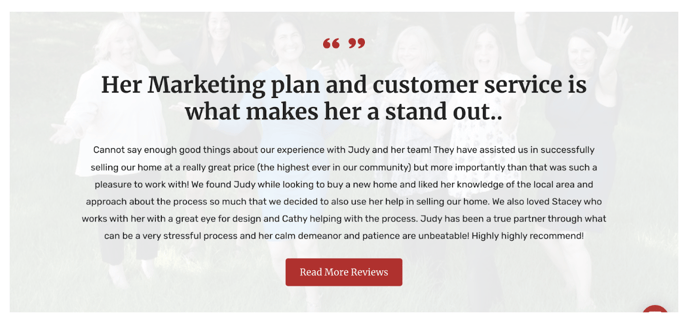
The Dark option will put a dark overlay on the background photo with white text on top.
This is how the Dark option will appear on your site:

Most Recent Post
This option will display the most recent blog post that is published and visible on your site.
Select the Most Recent Post related content type option.
Scroll down to the “Most Recent Post Settings” section. Here you can choose between two views: Split and Full.
The Split view will be displayed with the post title and author next to the featured image from the blog.
You can choose between Container Width and Full Width and Left or Right alignment.
This is how the Split view will appear on your site:
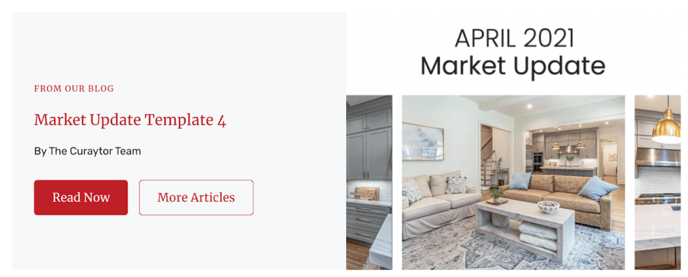
The Full view will be displayed with the post title and author with the featured image from the blog in the background.
This is how the Full view will appear on your site:
Choose Any Page
This option allows you to link to any other page on your website. Select the “Choose Any Page” option in your settings.
Scroll down to the “Page Settings” section and type the exact URL of the page you want to display in the “Page URL” box.
You have two design options for how this object is displayed on your site.
The overlay option will appear like this:
The CTA option will appear like this:
Youtube Playlist
This type of related content allows you to bring in an entire playlist from your Youtube channel to display your videos beautifully on your site.
Select the “Youtube Playlist” option in your settings.
Copy the URL of your playlist on Youtube and paste it into the “Link to youtube playlist” box under Playlist Settings.
You can upload a background photo here if you’d like, but this object will automatically pull in the thumbnails you have from Youtube.
This is how the Youtube Playlist will appear on your site:
Vertical Slider
Select the Vertical Sider related content type option. This option will display content vertically with a large full width image and slider on the left hand side to scroll through the selected content using a specific tag.
Under “Content Selection” you can edit the number of pages to show and enter in the tags from which you want the content to show.
This is how the Vertical Slider will appear on your site:
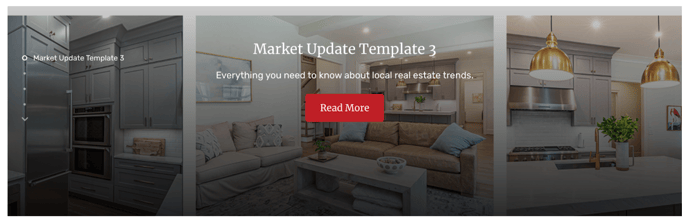
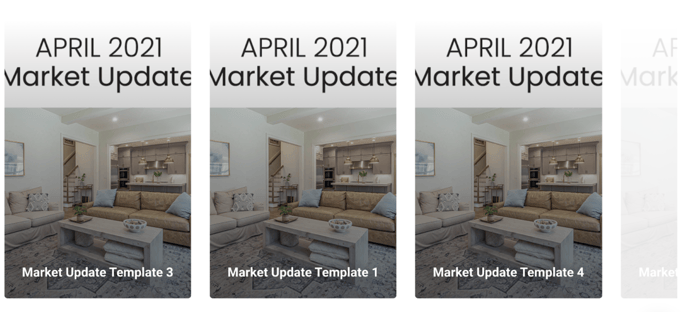
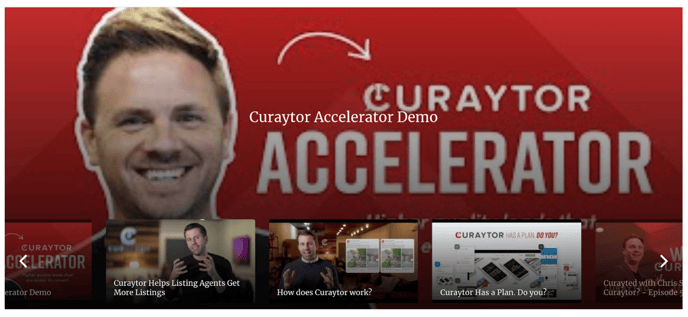
Multiple Pages Carousel
This option allows you to add multiple pages into a beautiful carousel view. This is perfect for adding a section for seller or buyer related content or highlighting featured listing pages you created on your site.
Select the Multiple Pages Carousel option in your settings.
Scroll down to the “Content Selection” section. Here you can choose the number of pages to show in this object on your site. You can choose between 1 and 12 pages but please note that you will only see 3 in the backend of your site when you are editing the object.
Next you can filter the content shown in this object by adding your content tags in the Search bar.
This is how the Multiple Pages Carousel appears on your site: