Page Object: Basic Text
This article will outline how to use the basic text object when building a page on your website.
Using the basic text object allows you to add text to your site.
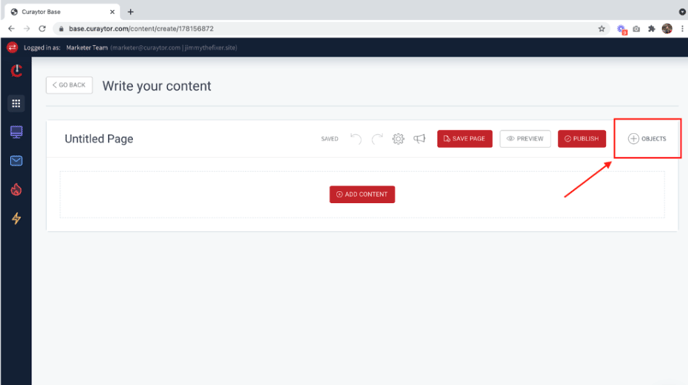
First, you'll start in the content creator and click the "+" to add an object.
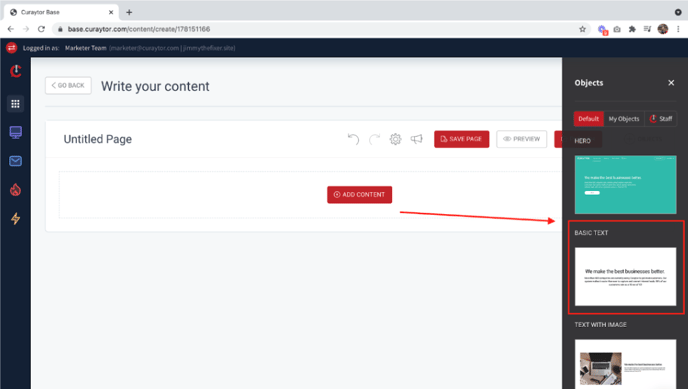
Scroll down to add the "Basic Text" object.
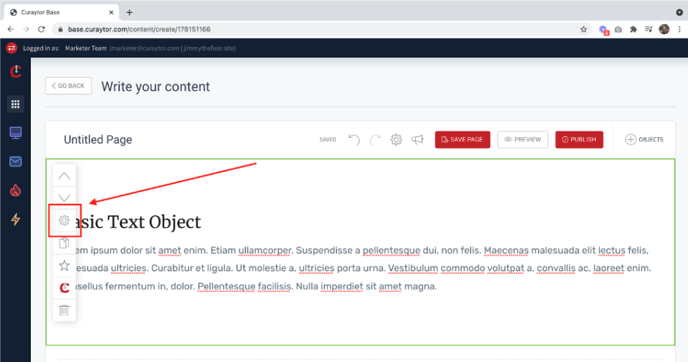
Select the object settings gear to access the settings of the basic text object.
You have two options for the layout of the text: Basic Text and Grid.
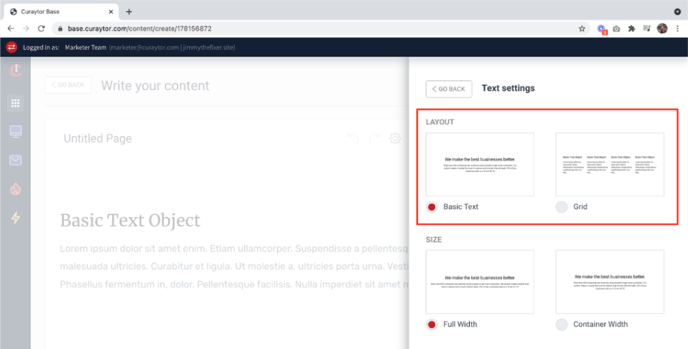
Basic Text is the standard paragraph layout and will appear like this:

The Grid layout allows between 1 and 4 columns of text and will appear like this:

Next, you can edit the size of the text object to be Full width or Container width.
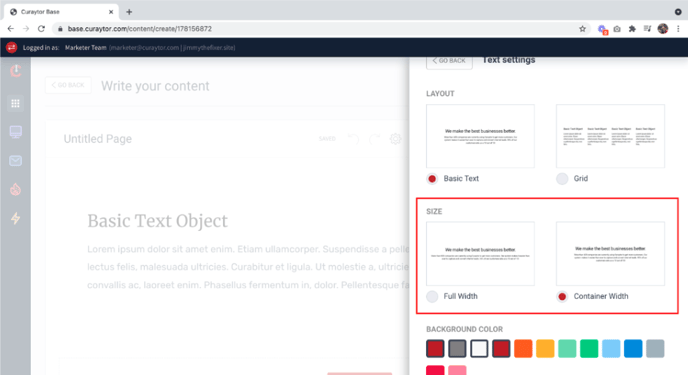
Full width will take up the entire width of your screen with little space on the left and right sides. We usually recommend using Container width as it adds spacing around the text and makes it easier to read.
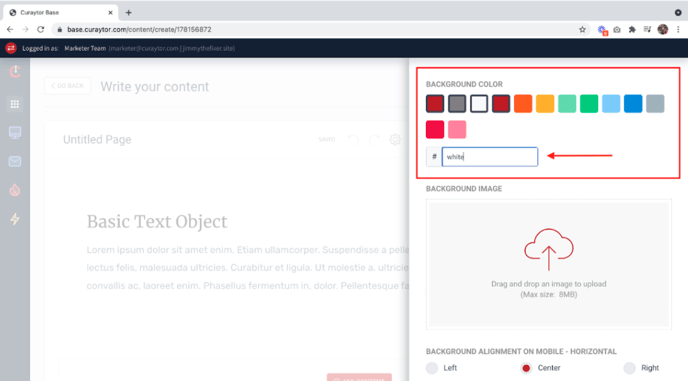
Next, you can edit the background color of the object. To change the color you can select a color that has already been added to your choices from your website settings or you can type in the hex code into the “#” box.
To add a background image to this object, upload an image that is under 8 MB (we recommend the photo be 1MB or less to optimize load speed) to the Background Image box.
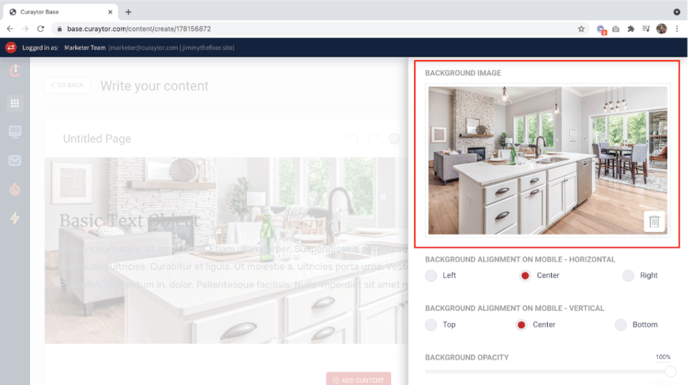
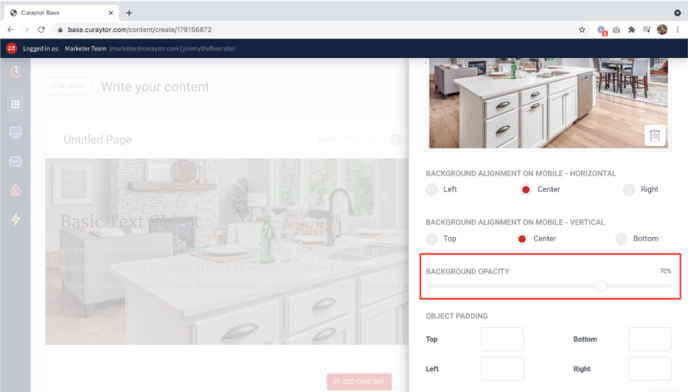
If you are adding a background image to this object and have text over the image we recommend adding background color and changing the opacity so the text is legible with a picture in the background.
To add a darker background color such as black, enter “000” in the “#” box or select a dark color from your color choices.
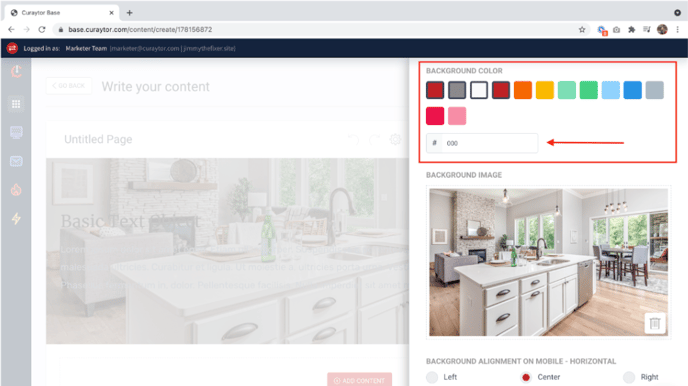
Then change the Background Opacity to about 70% using the slider. You should also change the text color to white.
This is how it will appear on your site:

To edit the color or size of the text in the object, highlight the text you want to change and a menu bar will appear. Here you can change the Paragraph style, alignment, bold, italics, or underline, and text size.