If you are more of a visual learner, check out this video walkthrough.
CSV/Spreadsheet Import Steps
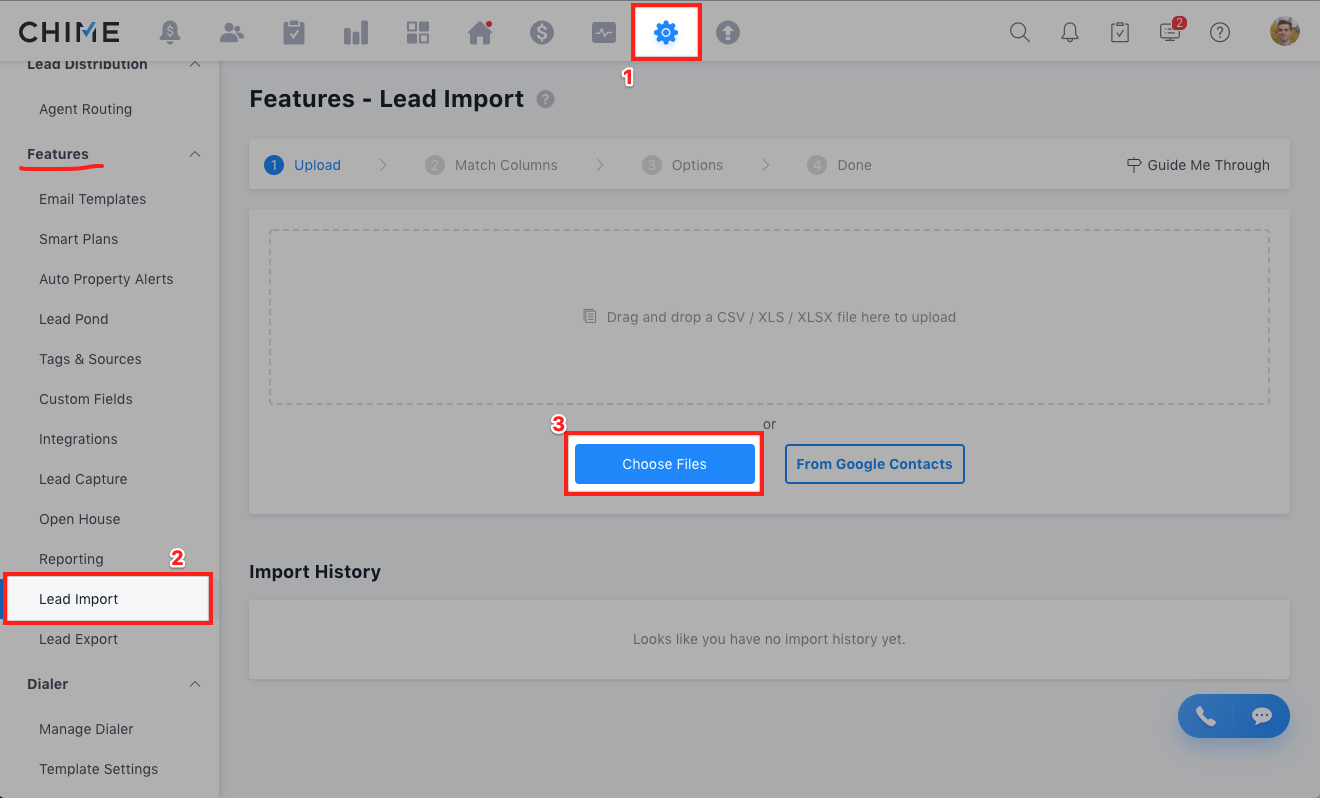
First, follow these steps to get to the right section in the CRM:
- Click on Settings
- Select Lead Import under the Features section
- Click on the "Choose Files" button to begin the import process
- Browse for and select the file containing the lead information
- Click "Open"
By default, the system will attempt to match the column names from the spreadsheet with the fields where the data belongs in Lofty. Typically, however, you will need to tell the data where to go in Lofty. You will do this by (a) referencing the column name and samples of the file which are available on the right side, and then (b) clicking on "edit" option in the "Lofty Field Name" column to designate the destination of that data in Lofty. For example, you would want to make sure "Lead Type" matched with "Lead Type" in Lofty.
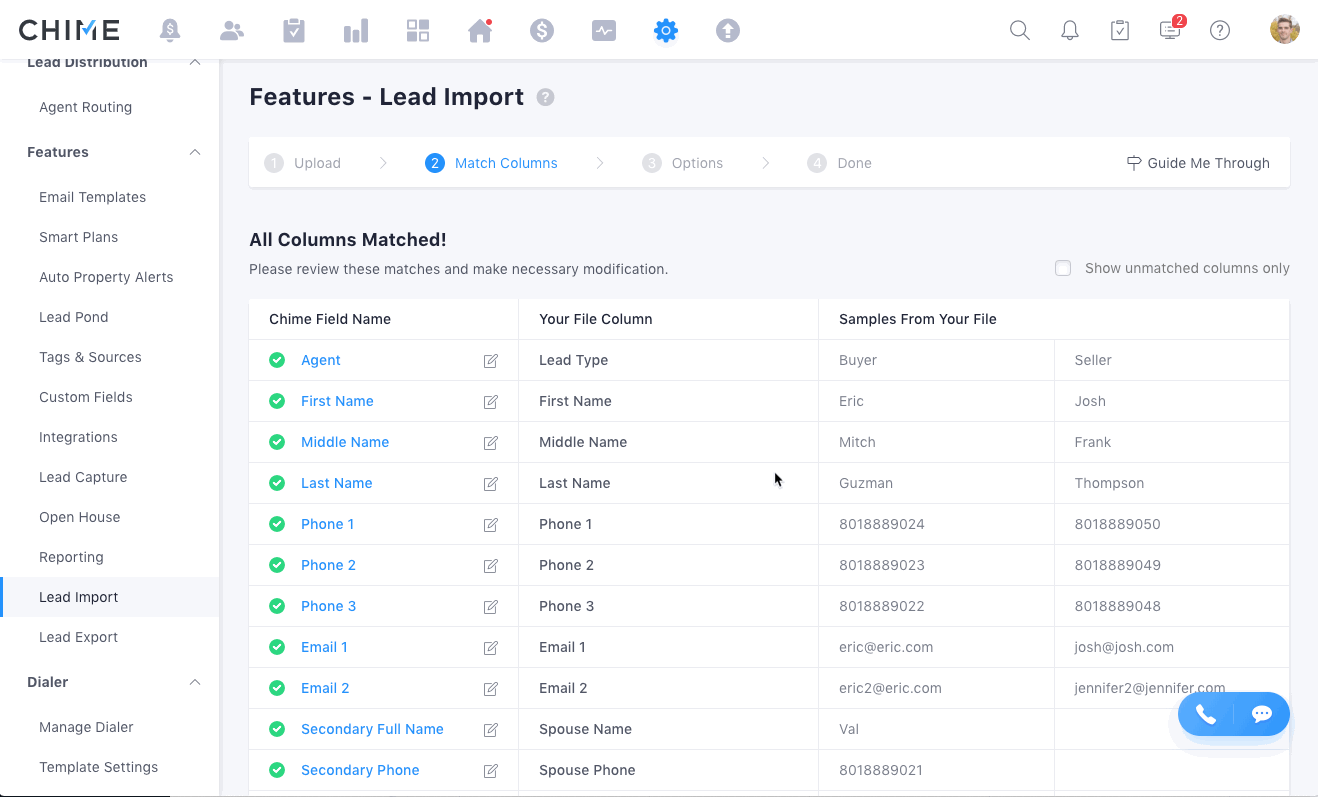
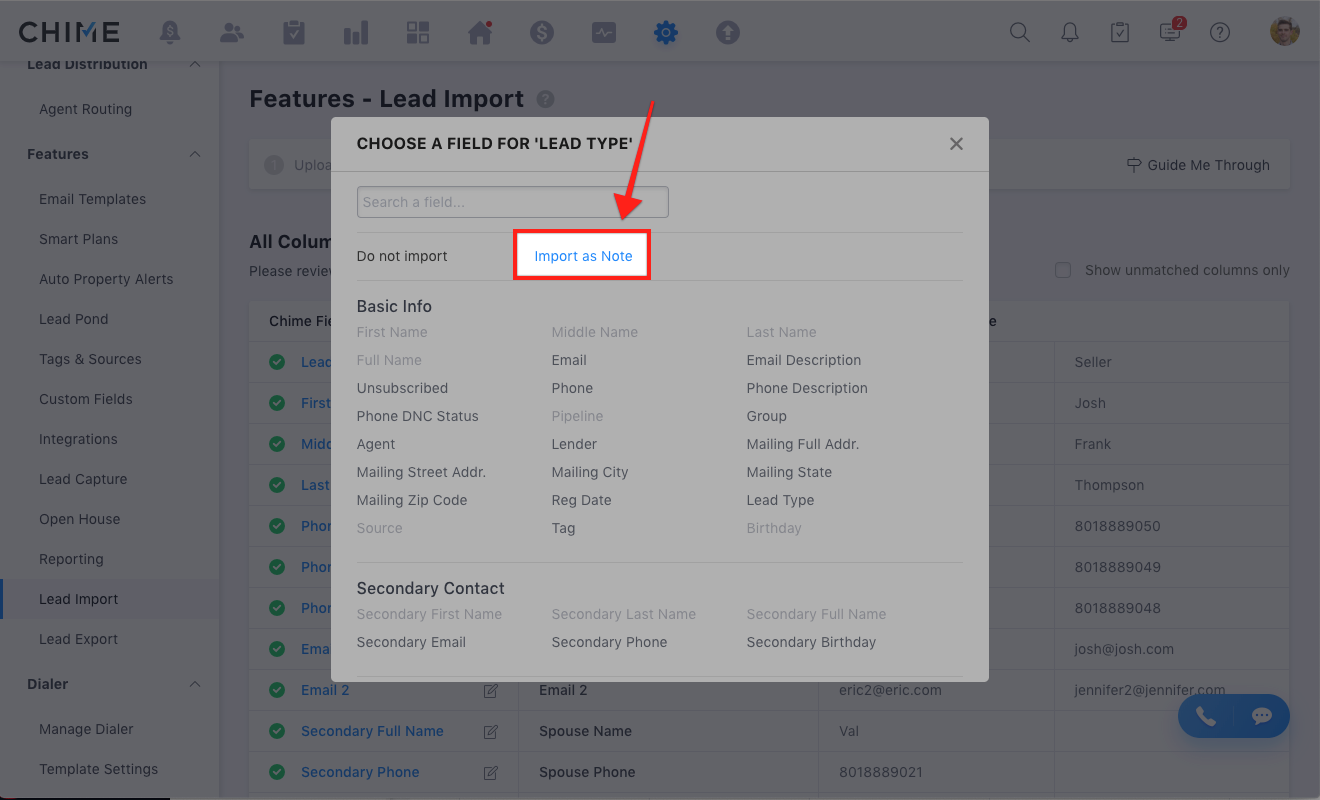
Repeat the above process until all the columns from the document are matched to fields in Lofty. Even if all the fields show as "matched," you will want to review them to make sure they import correctly. When you come across a situation where there is no field in Lofty that matches the data you are attempting to import, you have two options:
(1) Import directly to a custom field. You can only create 50 custom fields that are either "Date" or "Text." See Custom Fields.

(2) Import the data as a note. This will bring in the column name into the note along with the data itself. This will then be saved to a lead profile for future reference. This information is not searchable.
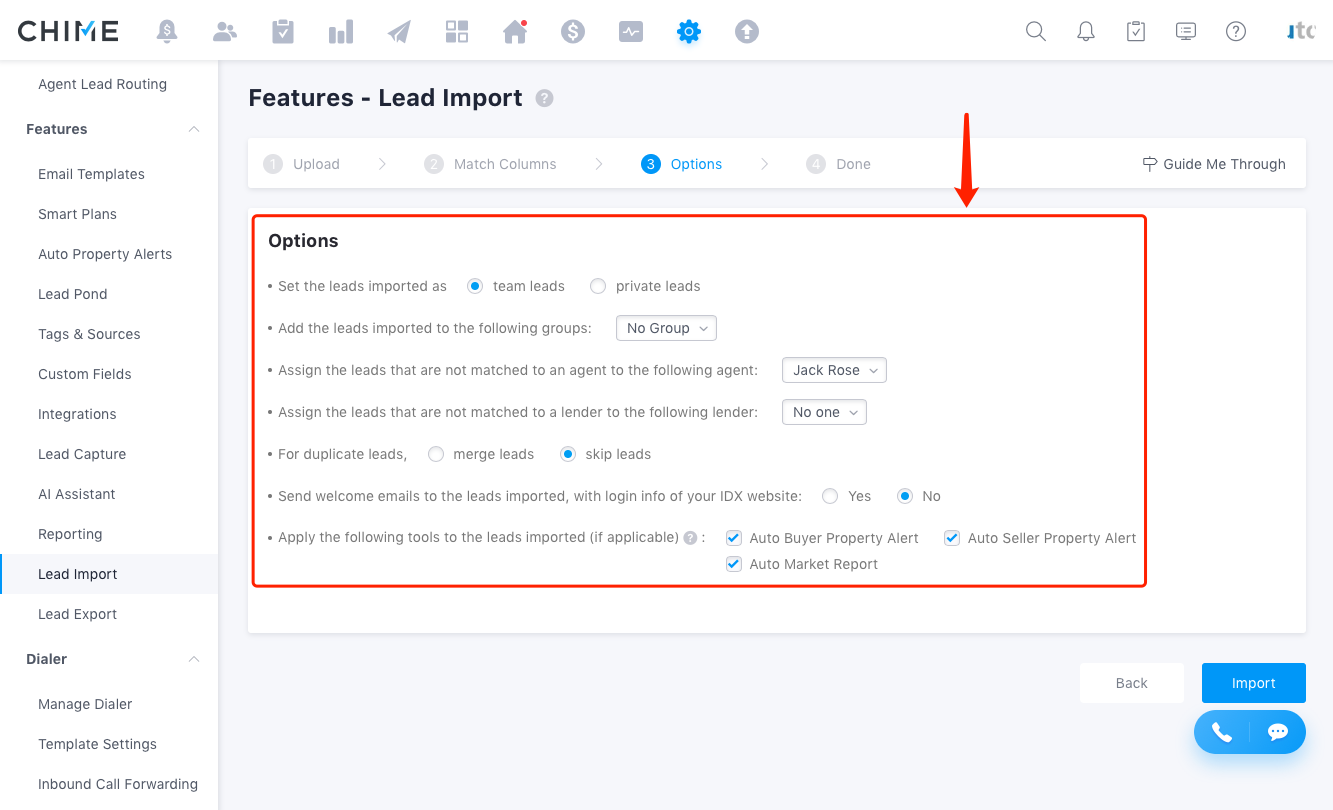
Once you have matched up all of the columns and have everything mapped to the desired location in Lofty, click on the "Next" button in the bottom-right.

You will then be presented with the following options to choose from.
- Choose from "Team Leads" or "Private Leads" (if you have permission to do so)
- Assign any groups to this entire import. Alternatively, you can create a column in the actual document with different groups for each lead, separated by commas.
- Assign unmatched leads to a specific agent. Alternatively, you can also create a column for the agent to assign the lead to and match it up with the "Agent" option on import so that they are assigned to that person automatically
- Assign unmatched leads to a lender. You can also create a column to assign directly to different lenders if you would like.
- Choose to merge or skip duplicates. If merged, the incoming data will merge and save as a note on that lead profile. If skipped, nothing will be combined. We recommend merging leads so no information is missed.
- Decide to send Welcome Emails to these imported leads or not. If you choose yes, you will want to make sure your IDX Website is up and ready with MLS data, etc. This will send out an email with that lead's login information so that they can connect to your Lofty IDX website and begin browsing listings.
- Choose to apply auto property alerts if so desired. These will be based off of any property information that comes in during the import.
CAUTION: Do not opt to send Welcome Emails and Auto Property Alerts if you do NOT want your contacts to received multiple emails from you at once.
If you are looking for more detailed instructions here is a video walkthrough. You can also refer directly to the Lofty help article.