When editing your site, you can edit a current Hero object or add a new Hero object. When selected, you can click on the gear icon to show you the different options you have with this single object (sorted in order of most to least used on the platform)
Simple CTA
When a new object is added to the page, you will notice that the default option is the Hero Simple CTA. A few things to note are the default text, color background, and two buttons. All of which you are able to edit.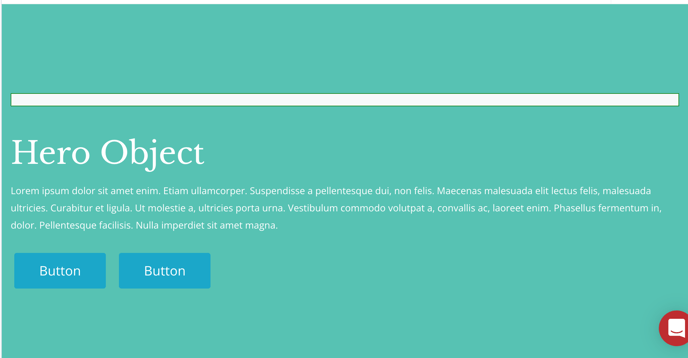
The text can be changed by simply clicking on the text and typing what you would like this object to feature.
As for the buttons, you would need for them to link somewhere on your site or elsewhere with a URL. When linked outside the platform, my recommendation would be to turn on the Open In New Window option in the button’s settings. If you choose not to link a button the button will not show on the front end. It will show within the editor but not on the front end or when you preview it. Hover over the button and the edit link window will pop up. There you will be able to add the URL to the page you want the button to link to.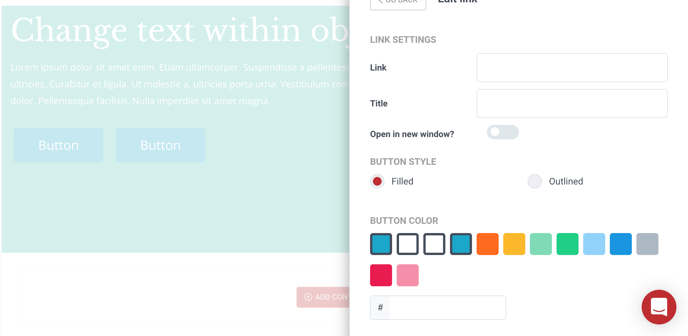
In order to edit the background you need to hover over the object and click on the gear icon. On the right hand side, you will notice a separate menu for the object which lets you add an image (8mb size or less) or even video (20mb size or less) in addition to changing color. You are also able to input the six alphanumeric hex-codes from your brand kit if the color you are looking for is not already there.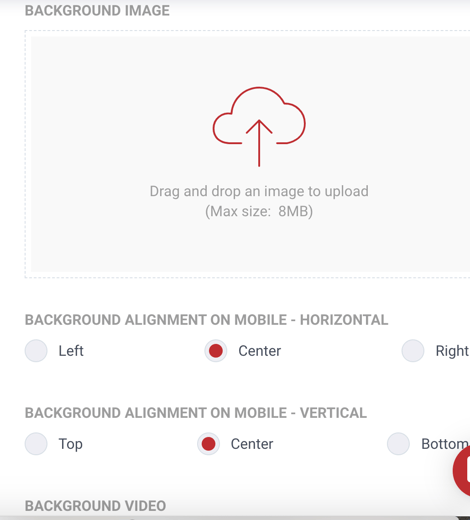
In this menu, you are also able to set your object’s padding which simply means the spacing between this object and its borders. Most of these tips also apply for the rest of the options we will be highlighting for you. But, let’s take a look at a few of the differences and ways you can maximize the object.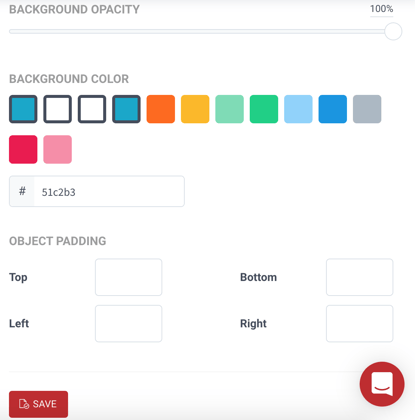
Video
In the video option, you are able to link to a youtube or vimeo link directly into the platform. On your site, your clients will have the option to play the video with sound.
Recommendation would be to use this as an opportunity to highlight the video you’re already playing in the background. However if you’d prefer a static image or color for the background, that is okay too!
Carousel
The carousel option is great for highlighting locations or services that link out to somewhere else to your site or elsewhere. It’s a blend of highlighting your services in a fun way by allowing mobile users to scroll through on their mobile device. By clicking on "add slide" this will allow you to add slides to the objects.

The separate menu on the right side will be your friend here if you are looking to modify the background.
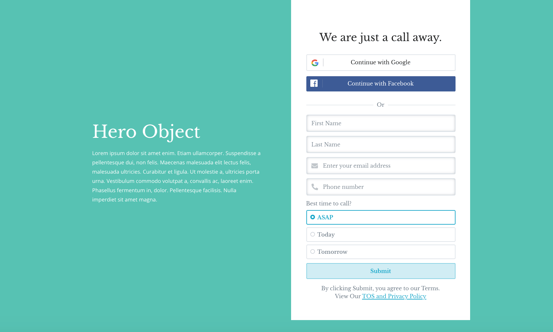
Schedule Form
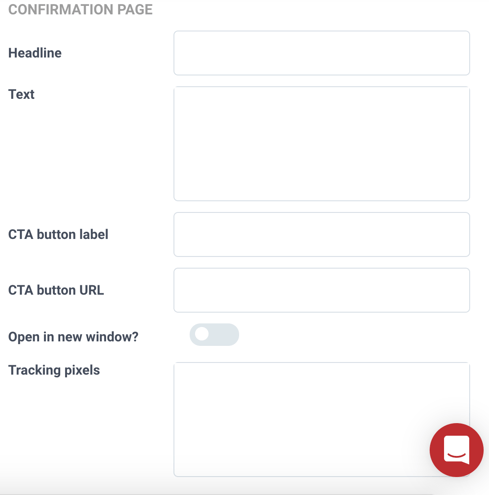
The schedule form works well if you’re looking to showcase a schedule form by itself. The confirmation page and the background are editable by clicking on the gear icon. In doing so, the confirmation allows you to guide your audience to where you’d like to send them in or out of your site.
Lead Gen
Unlike the schedule form, you are able to pair the form with text side-by-side.
This is very convenient when you are looking to highlight more information or even link call/text/email buttons that the audience is able to click on when navigating this object.
Features
The features option is mostly used to highlight individual features of listings or neighborhoods.
You will notice that to add these features you will need to click on ‘add feature’ to manually list what you’d like to highlight about the property or neighborhood.
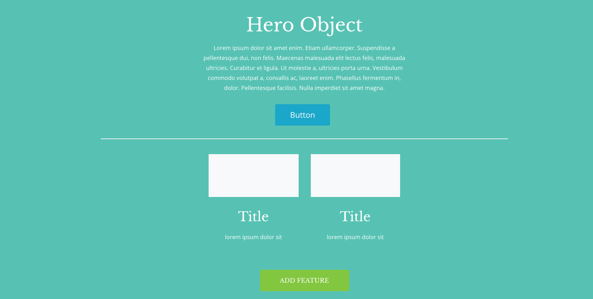
You’re able to add an image, this is a great opportunity to use icons if you’d like to elevate this object. Just hover over the title box and a edit button will pop up.
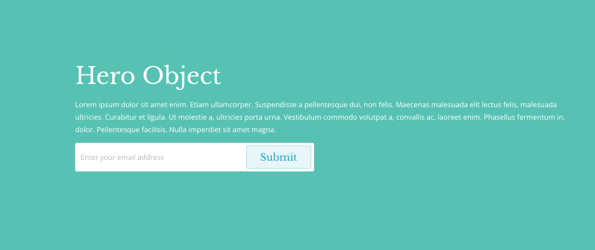
Email Subscribe
In addition to the subscribe section you have on the footer, the email subscribe option works wonderfully when you are catering content to your subscribers and want to gain an audience so that they are able to see the beautiful email content you have.
Image
Although most of the previously mentioned options have a background image, this object allows you to control the height of a single image with the padding option.
Facebook Subscribe
This replaces all your buttons into a preset facebook button that will send your audience directly to facebook.
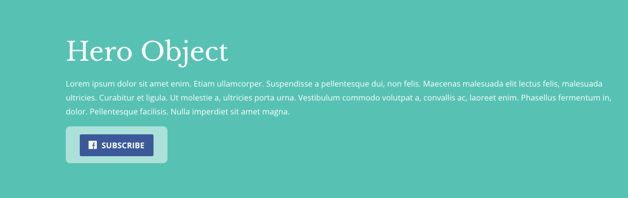
However, this may be an opportunity to consider the Simple CTA option as you have the option of adding your facebook plus another social media you use. And you can edit the colors of the buttons to reflect your brand.
Hero With Image
This object contains text along with a single button. You’re still able to change the image but if you’re looking to keep things consistent your best option is still the Simple CTA option or the CTA object.
Map
The map object is a great way to highlight a custom map that you’ve downloaded to a csv file & to also collect information about your potential clients. However if you’re not able to collect a custom map, you’re best option will be the Two Step Form. Most clients use this feature for their Experience Map (sold listings showcase)
Two Step Form
Our two step form is best used when offering your audience to submit a home value report. To edit the map in the background, you need to input the address of where you’d like the center to be. And you can edit the zoom level. The higher number on zoom, the closer up you’d get to the map.
To keep you at ease with the confirmation information, we have already provided one in your website labeled “Home Value”.
Remember: Each the object settings will be found on the left hand side of the object itself in the vertical toolbar.